There's a craft show coming up just before Thanksgiving. I got these mid-sized
pumpkins at the local market for super cheap. I've given them
an upgrade and plan sell them as table decorations for the big Feast Day.
I wonder what you think a good price would be...?

Here's a simple tutorial - you can make your own!

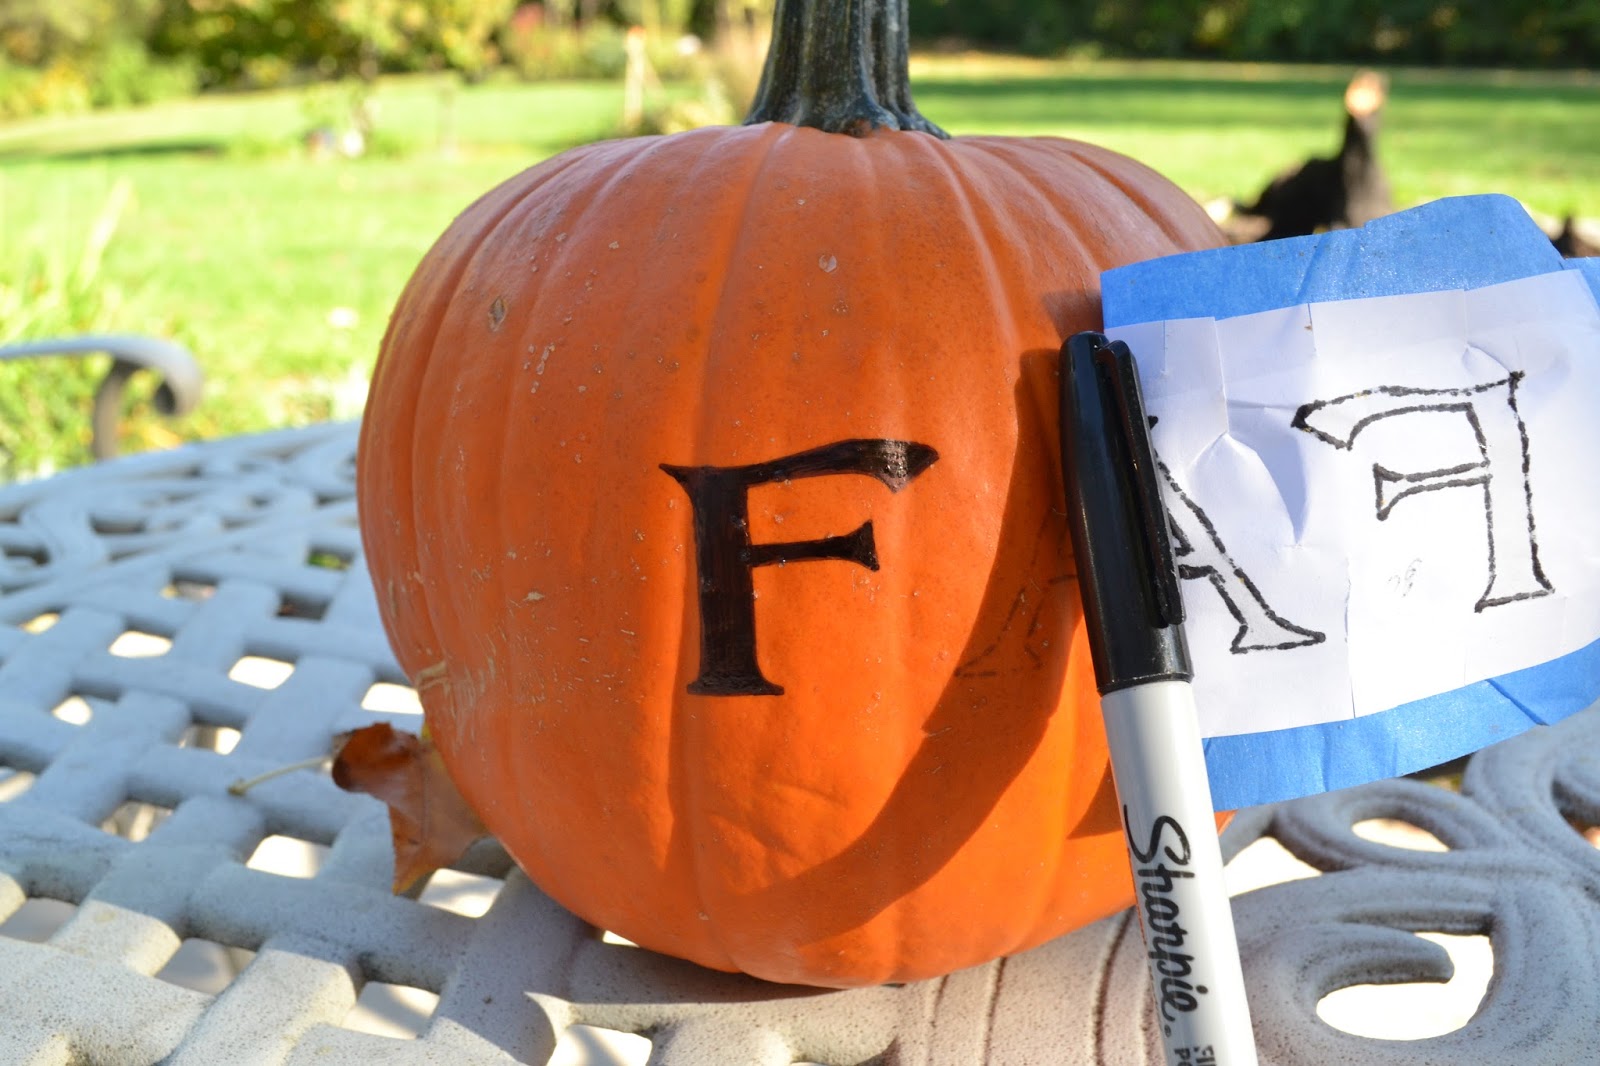
1. Start with a clean, dry pumpkin and the supplies pictured above.
Print your word on lightweight copy paper.
I used a font called 'Lightfoot Wide Expanded Regular' size 120.

2. Cut out the word and snip the top and bottom as shown.
This will make the paper lay flat against the pumpkin when you tape it in place.

3. Use painter's tape or masking tape to secure the paper tightly against the pumpkin.
It's OK to have small folds as long as they don't extend into the lettering.
Start with the short sides, then tape the snipped top and bottom.


4. Trace slowly around the outside of the each letter with a fine point sharpie marker.
The ink will soak through the lightweight paper and leave an outline on the pumpkin.
To make sure the ink is bleeding through properly, lift the template from one edge and take a peek.
Don't take it off completely because you won't be able
to reposition it in exactly the same place.


5. Use the fine point marker again and trace along the outline left behind.
Then color in the sharp corners because the thicker marker will not neatly do the job.
6. Fill in the rest of the letter with a regular tip sharpie.
Repeat for each letter.
I hope yours turns out well!
No comments:
Post a Comment
Thank you for taking the time to send your thoughts my way. I love to hear from you!